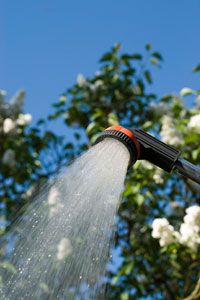
 “An outdoor shower is a refreshing treat on a hot day!iStockphoto/Thinkstock
Perhaps you want an outdoor shower for practical reasons: rinsing off before jumping in the pool or spa or after a beach outing; cleaning up and cooling off after a hard afternoon of gardening, building fences or mowing the lawn; or making sure the family doesn’t track in mud after playing touch football, volleyball or plain old catch.
Or maybe you want an outdoor shower for the sensory experience: You enjoy the feeling of cool water and the sun’s hot rays. Your home has gorgeous vistas or lavish landscaping, and you’d like to take the time to appreciate that beauty (while standing under a cool stream of water). Is there a late night shower under a full moon and starry sky in your future?
Outdoor showers are increasingly popular, probably because homeowners have figured out that this do-it-yourself project is one of the simplest of home additions to install. Read on to find out how to install an outdoor shower yourself.
Contents
- Backyard Shower: Tools and Materials
- Backyard Shower: Select a Location
- Backyard Shower: Plumbing
- Backyard Shower: Cover the Exposed House Wall
- Backyard Shower: Create a Back Wall for a Standalone Unit
- Backyard Shower: Lay Your Floor
- Backyard Shower: Beautify the Attached Back Wall
- Backyard Shower: Design the Sides
- Backyard Shower: Finish the Floor
Backyard Shower: Tools and Materials
Before you begin, research designs for outdoor showers online and in home and garden books and magazines to determine which style of outdoor shower will best suit your needs. The tools and materials will vary depending on your design decisions. But here are some you might need on hand:
Plumbing — You’ll need PVC pipes (for cold water) to start, and CPVC (hot water) pipes if you decide warm water is a must. The amount of piping you’ll need depends on how close your outdoor shower is to the house. Choose shower fixtures made of bronze, copper or brass; these materials won’t lose sheen over time. Purchase pliers, glue, PVC cutters, thumb and pipe wrenches to install pipes and fixtures. Of course, consult your local home improvement store to make sure you have the right materials on hand. (Many people opt to hire a plumber to handle this part of the project.)
Shower back wall — If your shower abuts a wall of your home, you may be removing siding to position the new plumbing then replacing that portion of the exterior wall with a 4-foot (1.2-meter) wide by 10-foot (3-meter) tall shower wall. For this, you’ll need a cement backer board, a cutting implement such as a circular saw, and thinset for adhering the decorative tile to the wall.
Shower walls — If you don’t need privacy, this will be simple; you can build a border at the base (read on for more about borders) and leave the outdoor shower open on three sides with no walls. But if you want privacy, there are a few options: glass block walls, free-standing privacy screens and wood stalls made of weather-resistant materials like cedar, teak, or some of the new treated-wood or fabricated wood solutions. (In this article, we’ll focus on the glass block option.) Or, you can create a less expensive private enclosure by simply installing a semi-circular shower curtain rod with shower curtain.
Flooring — Outdoor shower flooring is typically made of concrete, so you’ll need concrete mix and gravel to lay down before you poor the concrete. If you decide to add a decorate surface the floor, purchase ceramic, stone or rock tiles.
Extras — For comfort, consider shelves or hanging caddies for soaps and shampoos, and pegs or hooks for washcloths, towels, clothes and robes.
Backyard Shower: Select a Location
 “Is your backyard a beach? Enjoy a view of the ocean while you rinse off!Bananastock/Jupiterimages/Thinkstock
Where you install the outdoor shower depends on its function. If the shower is simply for keeping dirt out of the house before going inside, then installing the outdoor shower on the outside wall of the house fairly close to the entry is most practical. If the outdoor shower is for rinsing off before a dip in the pool, you’ll want it near the perimeter of the pool. It would do no good to shower near the house then track dirt with your wet feet while walking across the yard. If you want to shower while gazing at your colorful garden, or you’re fortunate enough to have vistas of valleys, mountains, a lake or the ocean, you’ll want to position your outdoor shower to take advantage of the panorama.
The spot you choose should be level, with plenty of soft soil beneath (if you don’t place the outdoor shower on soft soil, you may have to design a drainage system). Also consider whether you prefer your shower in the shade or in the sun. Most people enjoy the warmth of the sunshine along with the refreshing water spray. Plus, positioning your outdoor shower toward the sun will help dry the soil more quickly.
Backyard Shower: Plumbing
If you’d like your shower to be attached or next to the outside wall of your home, place it near your kitchen or bathroom, so you can cut into the walls and tap into that plumbing. If you want both hot and cold water, you’ll need to have both types of pipes for your backyard shower — PVC (cold water) and CPVC (hot water) — and install fixtures for both for the outdoor space. Place your new, exterior shower head connection about 7 feet (2.1 meters) from the ground. You may also consider a second exterior showerhead and faucet handle a few feet from the ground to rinse off feet and legs and for shampooing your dog, too.
Backyard Shower: Cover the Exposed House Wall
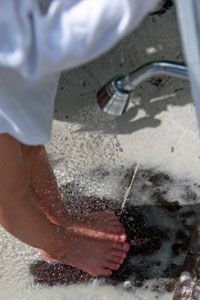
 “You might consider installing a second fixture near the ground so you can rinse your feet.Vstock/Thinkstock
After you install the plumbing against the exterior wall of your home, you’ll need to re-cover that wall to prevent moisture from entering the walls and also to create an attractive back wall for your shower. Most experts recommend you first seal the opening with cement backer board.
A cement backer board is a popular choice for walling off the back of an outdoor shower. This material keeps moisture out, and it comes in pre-cut sheets of concrete that only require screws for installation. The benefit of cement backer board is simple installation, but you will need to measure and mark where you need holes for the plumbing fixtures, then cut the holes. You can use a utility or scoring knife as a low-tech way to create the holes. It’ll be a little easier to drill holes in the corners of the demarcations, and then use a jigsaw drill to complete the openings. Always wear goggles when cutting cement.
The cement backer board is also designed to provide an excellent surface for laying decorative tile. After you’ve designed and set the base of your outdoor shower flooring (keep reading to learn more about setting your floor base), you can beautify the back wall of your new outdoor shower with tile.
Backyard Shower: Create a Back Wall for a Standalone Unit
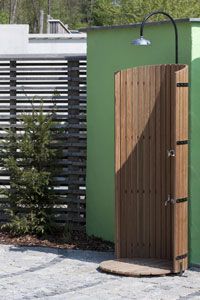
If your outdoor shower is not attached directly to the outer wall of your home, you’ll need some sort of structure to hold the plumbing and fixtures. It can be as simple as a vertical wood or metal pole, set about a foot into the ground and secured with concrete. Or you can build a wall of weather-resistant wood or tile that is 3 to 6 feet (0.9 to 1.8meters) wide, for example. A wider wall may allow you to add pegs and hooks for hanging clothes and robes, and hang caddies for soaps and shampoos. Of course, be certain to always use eco-friendly bath products outdoors, so you don’t violate municipal regulations regarding gray water drainage.
Backyard Shower: Lay Your Floor
 “Make sure any wood you use is weather resistant.iStockphoto/Thinkstock
Your outdoor shower needs a floor, and that floor should be constructed with a non-skid surface. You can simply lay pavers, or you can build a small deck-type floor made of weather-resistant wood. Some people use gravel for the outdoor shower floor, but that doesn’t sound very comfortable — and gravel tends to travel!
Another option is a concrete floor, which you’ll build by first digging out a square or rectangle in the earth and framing that with a wood border to hold the concrete while it sets. Pour a bed of gravel on the bottom, level it, and then pour concrete over the gravel up to the tops of the wood border. To help avoid standing water, be sure to tilt the border wood frame slightly toward where you want the water to run off.
You can create an attractive, non-skid concrete surface by giving your concrete a broom finish. When the concrete is partially hardened, use broom bristles to give the surface a swirly pattern. If you’ve set the concrete at a slope, be sure your broom marks run toward that edge to help with drainage.
Backyard Shower: Beautify the Attached Back Wall
Ceramic, slate and glass are popular tile materials for the back walls of outdoor showers. Stacked river rock tiles are increasingly popular, too. To install, you’ll need a thinset mortar (check with your supplier to be sure the type of thinset is suited to the application and type of tile). Apply the thinset to the cement backer board, which will allow the tiles to adhere to the cement.
The drawback to ceramic, slate and glass tiles for the back wall of the outdoor shower is that you may need to have the store cut individual tiles to cleanly fit the edges of the cement backer, depending on the size of tiles and the pattern you choose. Stacked river rock tiles are often the material of choice for the back wall of the outdoor shower because the sheets can be resized by simply cutting the mesh to which the stones are attached to attain a smooth edge to the sides of the shower’s back wall. River rock tile comes in various sheet sizes and may come in cases of 12-inch by 4-inch (30.4-centimeter by 10.1-centimeter) or 12-inch by 12-inch (30.4-centimeter by 30.4-centimeter), for example. As with all high-quality tile, prices vary, so you can pay way more than you would for natural stone or ceramic tile, or roughly the same, depending on your selection.
Backyard Shower: Design the Sides
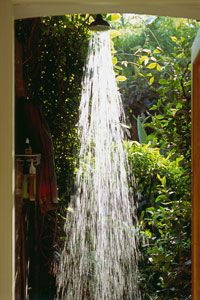
 “Some people opt for privacy walls; others do not. It just depends on the purpose of your shower.Francesca Yorke/Getty Images
For both freestanding showers and those abutting your home’s walls, you’ll likely want to direct the runoff using a border that will prevent water from spilling off to the sides. If the outdoor shower is near your garden, you can direct the runoff to help irrigate the flowers and plants. For a shower with the back wall attached to the home, you’ll want to direct runoff away from the home’s foundation.
You can make a border 5 or so inches (12.7 centimeters) high on each side of the concrete floor. A popular option is a glass block border. You use the thinset as you did with the back wall of the shower, applying it to the right and left edges of the concrete floor, then place the glass blocks side by side, back to front, with thinset between them to make them adhere to each other. For more privacy, you can continue building the glass blocks vertically until you have glass block privacy walls on each side of the outdoor shower. You can then install a shower curtain rod between the glass block walls and hang a curtain for more privacy.
Backyard Shower: Finish the Floor
The last step before installing your shower head and faucets is finishing your outdoor shower floor. You don’t have to finish the floor; you can use the simple broom finish on the concrete as described in the previous section of this article. Alternatively, you can get fancier and install tile on your outdoor shower floor.
Ceramic tile, slate tile — all the same types of tiles mentioned earlier in this article will work for finishing the flooring. Be sure to select a non-skid surface, though. If you used stacked river rock for the back wall that houses the shower head and fixtures, you can match that wall nicely (and easily) with river rock flooring. You’ll again adhere the river rock mesh sheets, which are often sold in 12-inch by 12-inch (30.4-centimeter by 30.4-centimeter) sizes, with thinset.
Lots More Information
Related Articles
- 10 Summer Decorating Ideas
- 5 Fancy Shower Heads You Wish You Had
- How to Tile a Shower Floor
- Should you take a cold shower after a workout?
- Tips for Grouting Tile
Sources
- Logan, Pat. "Build an Outdoor Shower." Creators.com. (Aug. 1, 2012) http://www.creators.com/lifestylefeatures/home-and-garden/heres-how/build-an-outdoor-shower.html
- McCarley, Billy. "Do it Yourself Outdoor Shower." eHow. (Aug. 2, 2012) http://www.ehow.com/way_5385210_do-yourself-outdoor-shower.html
- Beiles, Nancy. "Outdoor Showers." This Old House Magazine. (Aug. 2, 2012) http://www.thisoldhouse.com/toh/article/0,,20209468,00.html
- diyNetwork.com. "How to Build an Outdoor Shower." (Aug. 1, 2012) http://www.diynetwork.com/how-to/how-to-build-an-outdoor-shower/index.html
- McKinnon Materials Inc. "River Rock Flooring." (Aug. 2, 2012) http://www.mckinnonmaterials.com/river-rock
- 10 Summer Decorating Ideas. "7: Install an Outdoor Shower." (Aug. 3, 2012) https://tlc.howstuffworks.com/home/10-summer-decorating-ideas4.htm
- Gardner, Chris. "How To: Make an Outdoor Shower." (Aug. 4, 2012) http://www.bobvila.com/articles/2486-how-to-make-an-outdoor-shower/pages/1
- The Family Handyman. "How to Finish Concrete." (Aug. 1, 2012) http://www.familyhandyman.com/DIY-Projects/Concrete—Brick/Concrete/how-to-finish-concrete/View-All


